Cloud
“Invalid Host Header” Errors when running your React project off your cloud ide
This one was a pain. So your react app is hosted on localhost:3000 and your node backend is on localhost:3001. This isn’t a problem if you a developing locally. You open up your browser and everything connects perfectly. But if you are developing on a cloud ide or vps, you are probably connecting to something like someweirdname.cloudidename.com.
By itself, running npm start will give you your project nicely. But once you have a backend that your browser isnt accessing locally, you might get the dreaded “Invalid Host Header”
Here is how I fixed my problem:
File: package.json add the following: where the value is your ide host name
"proxy": "http://mybackend.mycloudidehost.c9.io"
.env.development.local <- thats DOT ENV DOT DEVELOPMENT DOT LOCAL , I spent a good while troubleshooting because of the missing DOT, add the following:
DANGEROUSLY_DISABLE_HOST_CHECK=true
The above is not recommended if you are developing locally, but its a cloud ide.
Heroku : Application error : error code=H12 desc=”Request timeout” : when using remote database
I was working with a Node application I built, which connected to a hosted MongoDB database. Everything worked perfectly on my development machine. Once I pushed everything to heroku is where I would start getting problems.
I received this error after trying to connect to my apps webpage
An error occurred in the application and your page could not be served. If you are the application owner, check your logs for details. You can do this from the Heroku CLI with the command
heroku logs --tail
When checking the logs this error stood out
2019-08-01T18:36:14.968797+00:00 heroku[router]: at=error code=H12 desc=”Request timeout” method=GET path=”/api/notes” host=spongebobs-basin
-47509e646.herokuapp.com request_id=e70f60dc-321d-421c-9c24-6974ba3a79bb fwd=”99.99.99.9″ dyno=web.1 connect=0ms service=30000ms status=503 b
ytes=0 protocol=https
So what are the important things in this line?
- desc=”Request timeout”
- method=GET path=”/api/notes”
- service=30000ms
- status=503 b
I am connecting to the correct path, using the correct method, but after 30 seconds the server is timing out , so heroku sends a 503 Service Unavailable.
This was a strange one to figure out since locally everything worked great. I changed some things around for testing and found that the application on heroku was not connecting to the remote mongoDB host. Locally it worked great. Was this a herkoku problem?
Solution:
The .env file I used locally required the mongoDB URI to be in quotes. The app would not work without the quotes. But the configuration variables in heroku needed to be added without the quotes.
- .env ‘mongodb+srv://username:password@somecluster.mongodb.net/note-app’
- Config Vars mongodb+srv://username:password@somecluster.mongodb.net/note-app
Google app engine : Viewing the different versions of your app
your app is you_project_id.appspot.com
you can view different versions of your app by adding versionnumber and dash in front of that
example: (URLs aren’t mean to work)
my example project url is:
http://coolaproject-1231-1231.appspot.com
i can view both version 1 and version 2
to view version 1 it would be
http://1-dot-coolaproject-1231-1231.appspot.com
to view version 2 it would be
http://2-dot-coolaproject-1231-1231.appspot.com
etc.
Problems logging into newly created vCloud Air virtual machine.
Have you created a virtual machine but are having problems logging in?
If you visit my last post on virtual machine creation in vCloud Air , you will see that there were no options to preselect usernames and passwords for the vm.
How do we logon in??
To resolve this we are going to have to go through a few steps.
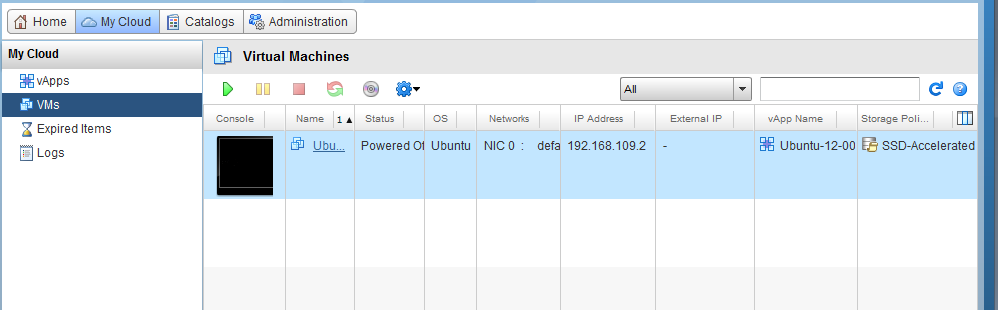
Go back to the vCloud Air portal and power off the machine.
In this image I’m waiting for the vm to go down.
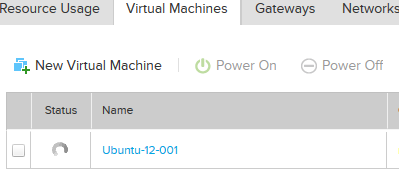
Once the vm is off,
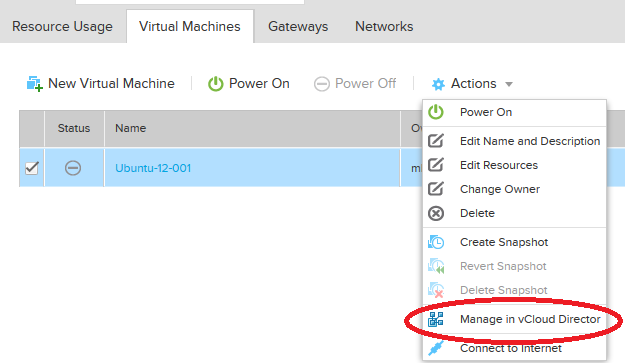
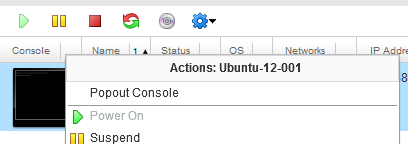
Select the virtual machine,
Then in the actions drop down box choose: “Manage in vCloud Director”
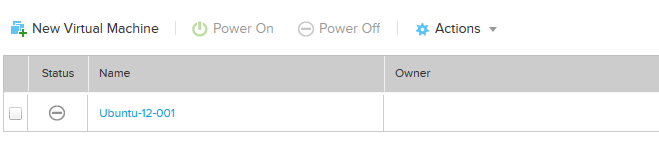
A new window will pop up.
In this windows, on the upper left corner click “My cloud”
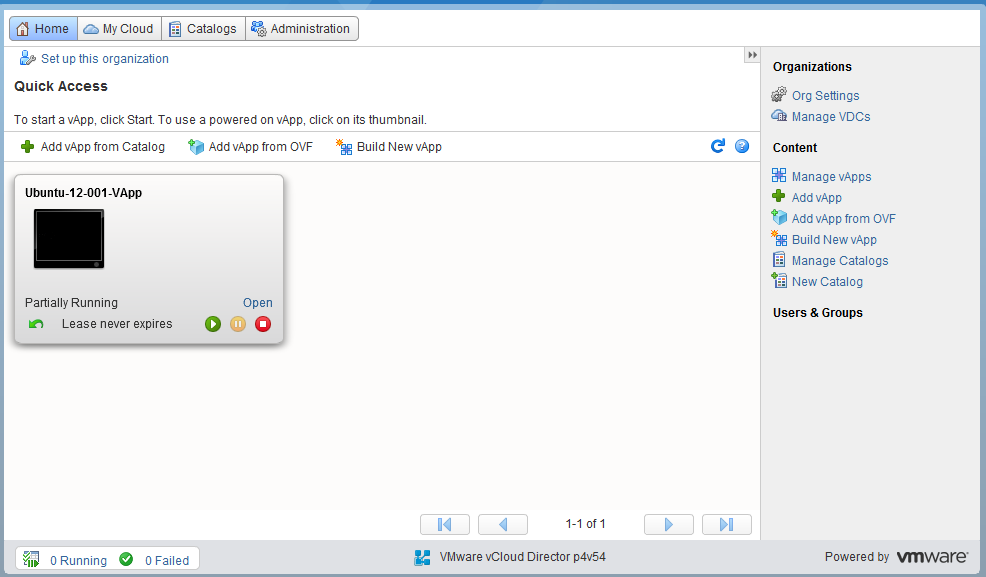
Now the view changes.
Click vms and find your virtual machine.

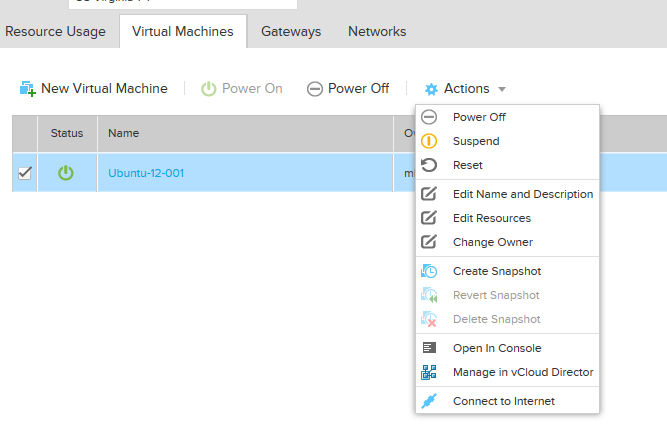
Right click your virtual machine and select properties

Select the “Guest OS customization tab”
You should see the auto generated password for your vm

Now hit cancel and go back and power on your vm
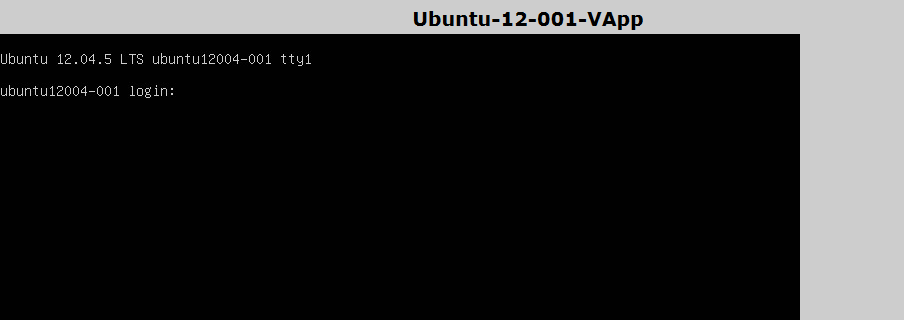
Then open the console. (right click the vm to pop out the console)
Now you should be able to logon and change your password.

Creating a virtual machine on vCloud Air
Objective here is to create a new virtual machine in vCloud Air.
As you can see I have no virtual machines in my Virtual Data Center
Click on “create your first virtual machine”

Several default options to choose appear.
These are a handful of default options which incluse (as of this posting)
- CentOS 6.3 (32/64)
- CentOS 6.4 (32/64)
- Ubuntu Server 12.04 (32/64)
- Windows 2008R2 Standard (64)
- Windows 2012 Standard (64)
- Windows 2012R2 Standard(64)
Of course you can upload your own options but at the moment we will chose one of the defaults:
I’m choosing Ubuntu server 64.

Now customization options will appear.
Here you can name your vm, and allocate resources,
The cost per hour is generated as you play around with the options.
The more resources you consume, the greater the charge.

Now you see the vm being created, and the status will circle.
Still waiting on the status to update.

Once the vm is ready the status will show that its powered off
I chose to leave it powered off at first
The option to start powered on was also there.
Check the box next to the vm and power it on
You could also select the drop down and power it on or just the nice big button above.

Once the vm is on the status changes.

To view the console of our newly powered on vm
- Select the vm,
- Select the actions drop down
- Choose “open in console”
Now the Console pops out and we can see the console and use the vm.
The buttons on the upper right are for
- sending control alt del
- going full screen

if you just created your vm you may have problems logging on.
See the next post for updates
