Month: July 2015
Problems logging into newly created vCloud Air virtual machine.
Have you created a virtual machine but are having problems logging in?
If you visit my last post on virtual machine creation in vCloud Air , you will see that there were no options to preselect usernames and passwords for the vm.
How do we logon in??
To resolve this we are going to have to go through a few steps.
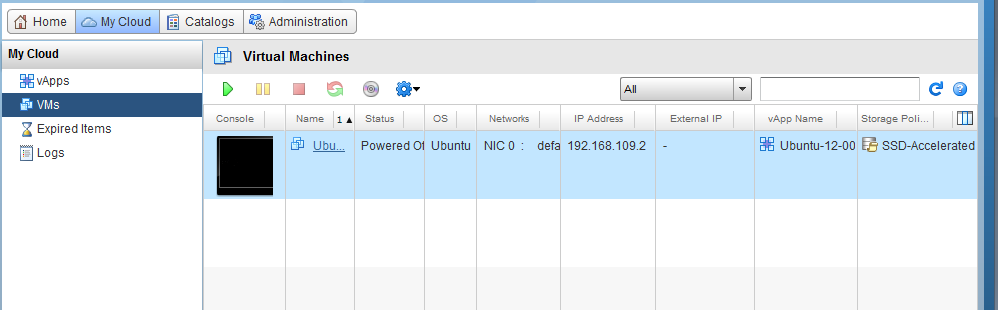
Go back to the vCloud Air portal and power off the machine.
In this image I’m waiting for the vm to go down.
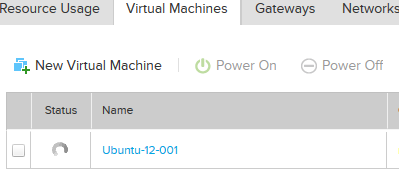
Once the vm is off,
Select the virtual machine,
Then in the actions drop down box choose: “Manage in vCloud Director”
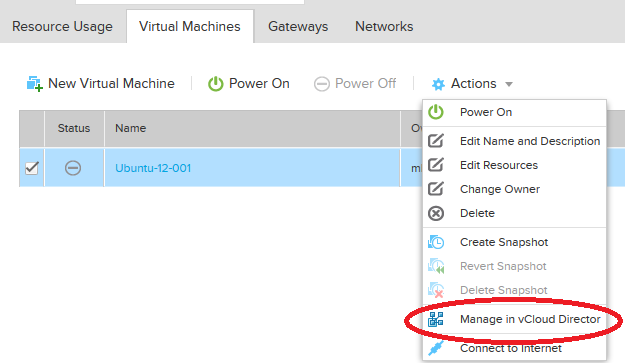
A new window will pop up.
In this windows, on the upper left corner click “My cloud”
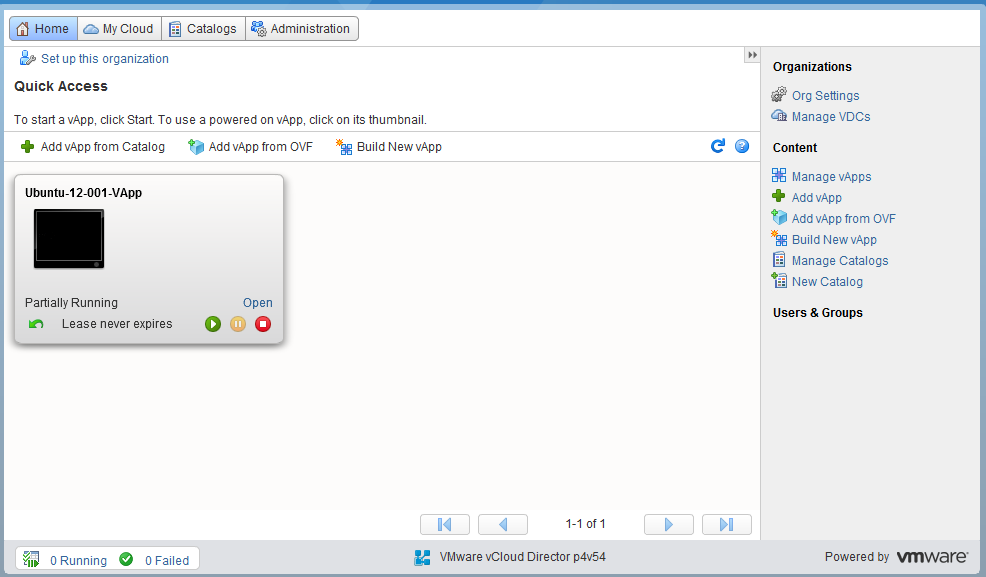
Now the view changes.
Click vms and find your virtual machine.

Right click your virtual machine and select properties

Select the “Guest OS customization tab”
You should see the auto generated password for your vm

Now hit cancel and go back and power on your vm
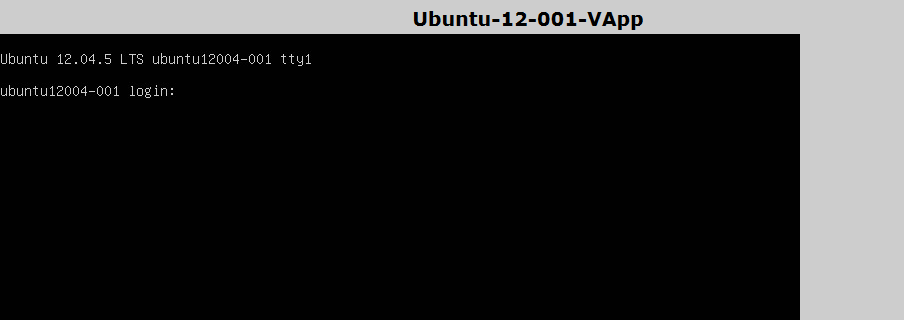
Then open the console. (right click the vm to pop out the console)
Now you should be able to logon and change your password.

Creating a virtual machine on vCloud Air
Objective here is to create a new virtual machine in vCloud Air.
As you can see I have no virtual machines in my Virtual Data Center
Click on “create your first virtual machine”

Several default options to choose appear.
These are a handful of default options which incluse (as of this posting)
- CentOS 6.3 (32/64)
- CentOS 6.4 (32/64)
- Ubuntu Server 12.04 (32/64)
- Windows 2008R2 Standard (64)
- Windows 2012 Standard (64)
- Windows 2012R2 Standard(64)
Of course you can upload your own options but at the moment we will chose one of the defaults:
I’m choosing Ubuntu server 64.

Now customization options will appear.
Here you can name your vm, and allocate resources,
The cost per hour is generated as you play around with the options.
The more resources you consume, the greater the charge.

Now you see the vm being created, and the status will circle.
Still waiting on the status to update.

Once the vm is ready the status will show that its powered off
I chose to leave it powered off at first
The option to start powered on was also there.
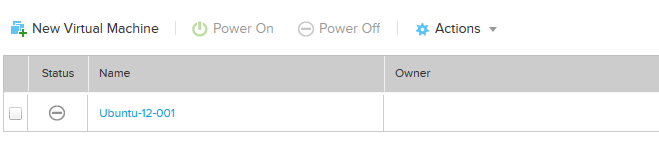
Check the box next to the vm and power it on
You could also select the drop down and power it on or just the nice big button above.

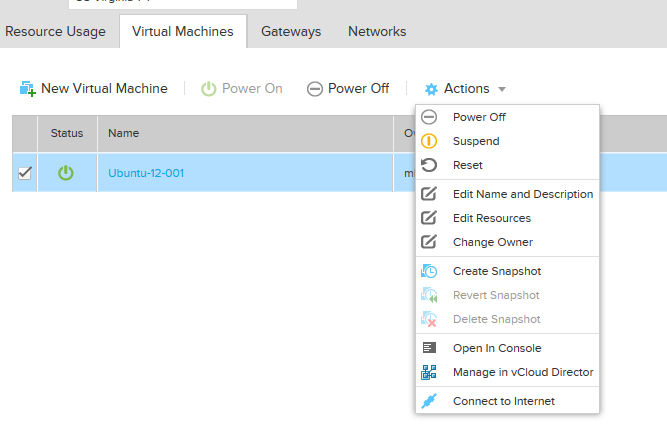
Once the vm is on the status changes.

To view the console of our newly powered on vm
- Select the vm,
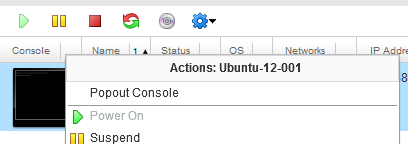
- Select the actions drop down
- Choose “open in console”
Now the Console pops out and we can see the console and use the vm.
The buttons on the upper right are for
- sending control alt del
- going full screen

if you just created your vm you may have problems logging on.
See the next post for updates
Failover using Vmware Site Replication Manager (SRM) 5.5 And Dell Equallogic Storage Replication Adapter (SRA )
Datacenter Site A:
There is a problem where we know we have power outages coming or we have one currently:
In this example: volumesiteA is volume with vms that needs to be failed over to recovery site B.
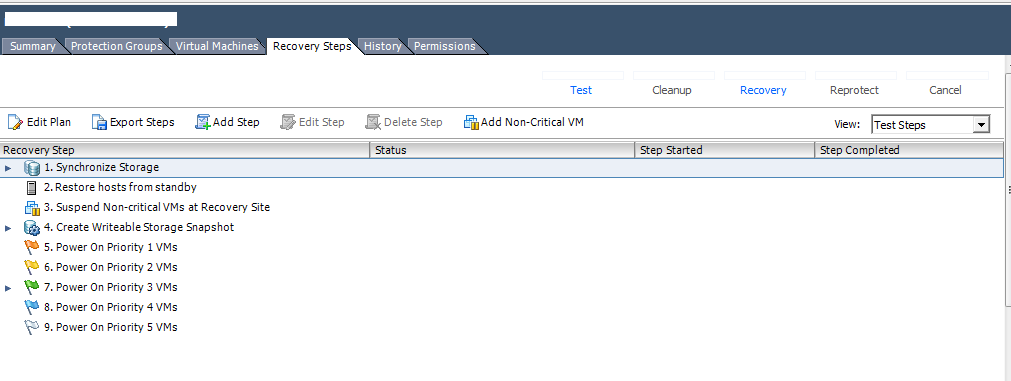
Recovery to start actual failover to Datacenter Site B:
A warning will pop up:
The difference between planned migration and disaster recovery is that if there are errors the recovery will stop if its planned.
In a true DR situation where site A is down use forced recovery.

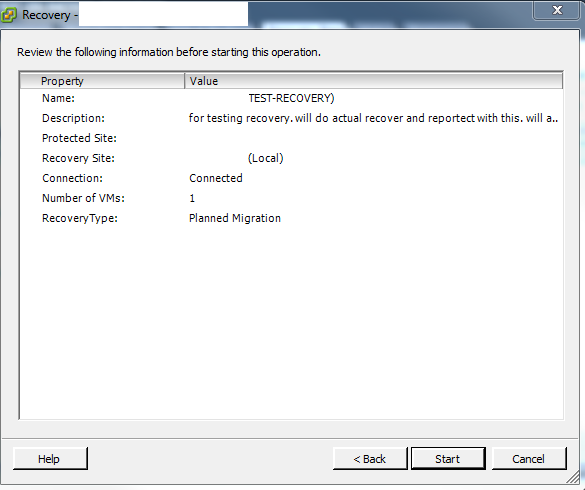
One we hit start the recovery begins.

On the Equallogic side you can see that the volume status is set to offline

On recovery site B you will see a new volume appear

Once recovery is complete you can test your migrated servers


If we go back to the failed over datastore on site B, we will see
The volume is not replicated

You may get “amount of in-use snapshot reserve exceeds the warning limit”

Go over to the snapshot windows and delete some snapshots or increase space dedicated to snapshots

If we look at the volume on site A
We will see that the volume is still has a replication job to site B, though it will fail (notice the cancel)

